
3. Clients (Customers)
Clients are the employers and recruiters who hold accounts on the system to place jobs and search for CVs/resumes.
3.1. Search Clients
Client accounts can be searched by ID number and client name (including partial matches). Alternatively the list can be filtered based on the account status
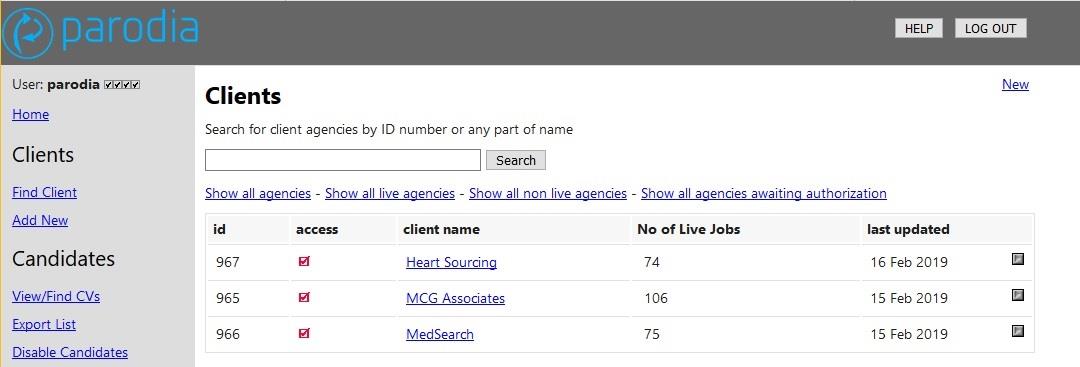
3.1.1. Log in as Client Button
Clicking the button to the far right of the client record listing will log the user in as that client (account admin user) within the third party area (recruiters' control panel). This is useful when providing support to clients.
3.1.2. Edit Client Account Button
The hyperlinked name of the client will bring up the screen to edit the client's account. A sub menu at the top right of the screen provides easy access to allocate a package of services to a client, and to view statistics about their use of the site.
3.2. Edit Client Account

The hyperlinked name of the client will bring up the screen to edit the client's account. A sub menu at the top right of the screen provides easy access to allocate a package of services to a client, and to view statistics about their use of the site.
3.2.1. Edit Client Data
Client data such as company name, contact details, passwords and logos can be edited from the Edit Client page. Each client type is set as either a recruiter or an employer. This is required as candidates can elect to hide their CV/resume from either recruiters (recruitment/staffing agency), employers or both. For example a candidate might wish to avoid their employer finding their CV/resume, and so restrict it to recruiters only.
3.2.2. Add Client Services
Following the appropriate link at the top right of the Edit Client page returns the client services page. Here a package of services (job posting, CV/resume viewing) can be allocated to a client's account. To allocate a package either select one of the existing package listed on the page, or enter details for a custom package towards the lower half of the page. If a Parodia system is setup for ecommerce a client can purchase packages during account creation when they first sign up, and from within their account once it is created.